Show How to get your API Key
Show How to get your API Key
How to find your Public API Key:
Flow: Project Home → Integrations → Human Behavior SDK → Kebab Menu → Configuration → Public API Key
Flow: Project Home → Integrations → Human Behavior SDK → Kebab Menu → Configuration → Public API Key
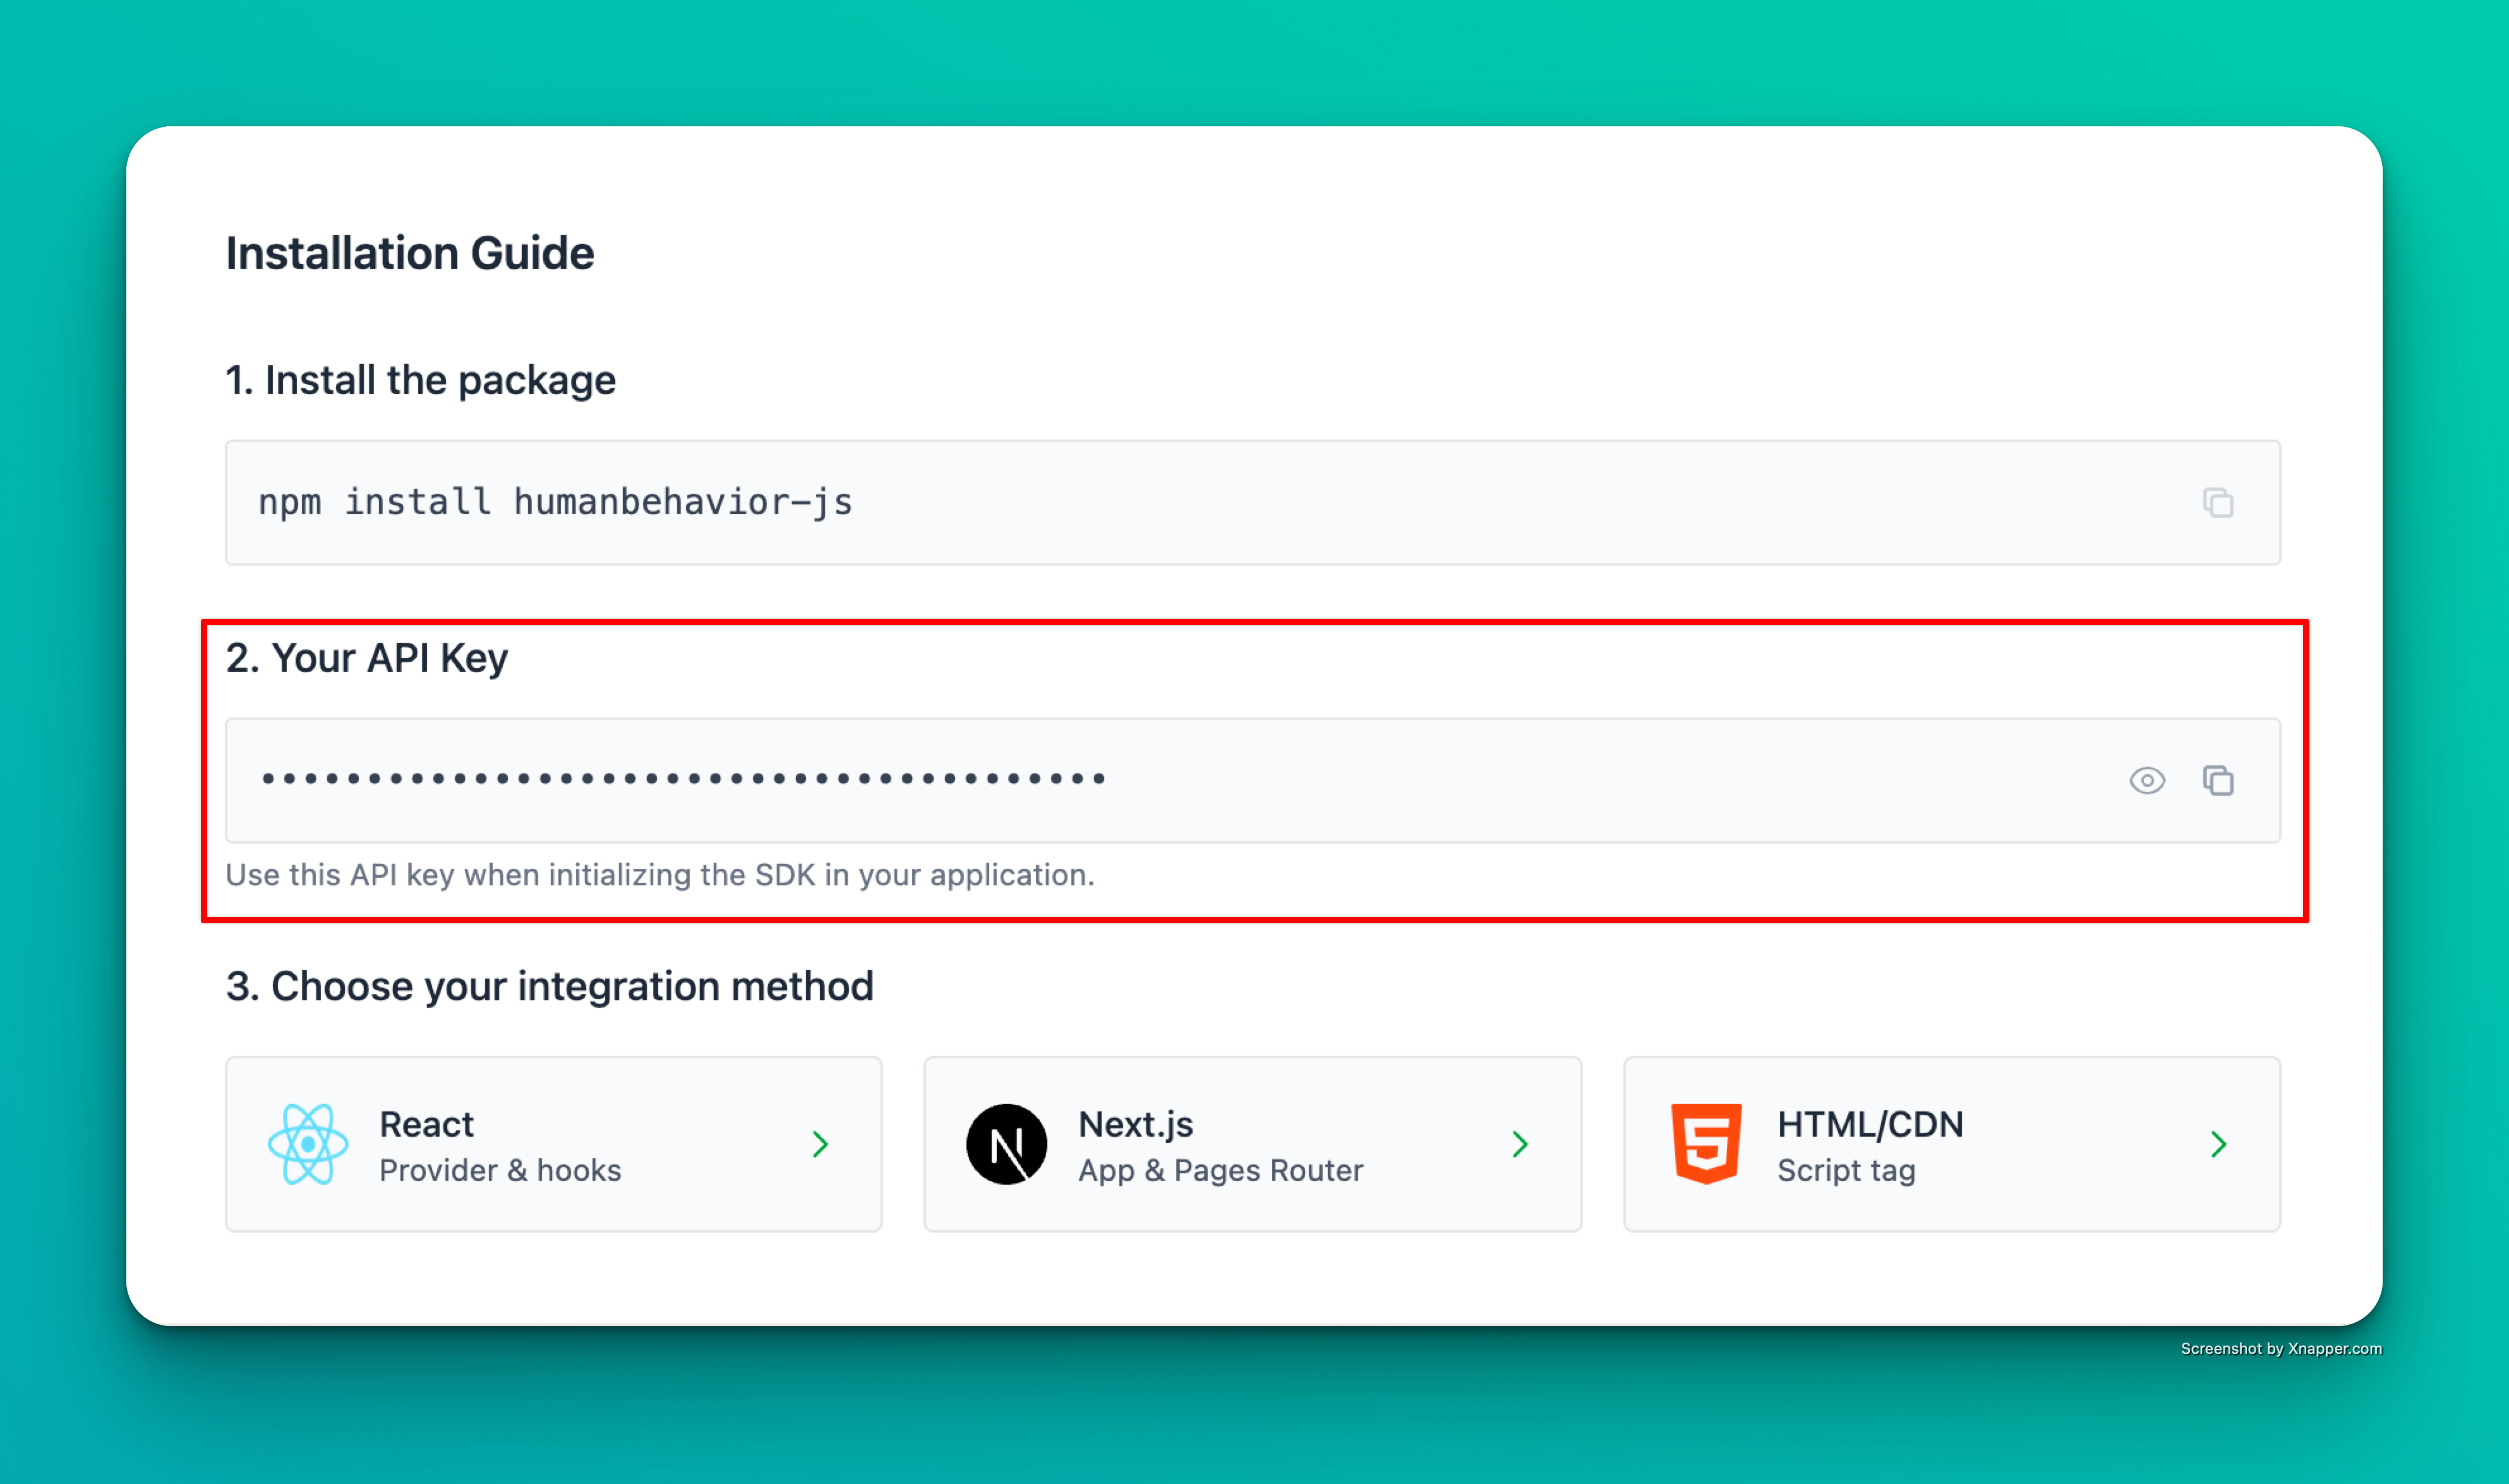
Example screenshot – your actual API key will be different.
Step 1: Installation
Step 2: Basic Setup
Create a HumanBehavior Component
Create a new component filesrc/components/HumanBehavior.astro:
Add the Component to Your Layout
In your main layout file (usuallysrc/layouts/Layout.astro):
That’s it! The SDK now automatically tracks user interactions, navigation, and console events. Everything past here is optional.
Step 3: Environment Variables
Create a.env file in your project root:
Security Best Practice: The
PUBLIC_ prefix is required for Astro to expose the environment variable to the client-side code.Optional: Advanced Features
Track Custom Events
You can track custom events from any Astro component:User Identification
Identify users after authentication:Data Redaction
Configure data redaction for sensitive information:Astro-Specific Considerations
Client-Side Only Execution
Astro components run on the server by default. The HumanBehavior SDK must run on the client side, which is why we use the<script> tag in the component.
Environment Variables
Astro requires environment variables to be prefixed withPUBLIC_ to be available in client-side code.
Performance
The HumanBehavior component is lightweight and won’t impact your Astro site’s performance. It only loads the tracking code when needed.SSR Compatibility
The SDK is fully compatible with Astro’s SSR (Server-Side Rendering) and SSG (Static Site Generation) modes.Troubleshooting
Common Issues
“API key not found”- Ensure your environment variable is prefixed with
PUBLIC_ - Check that the
.envfile is in your project root - Restart your development server after adding environment variables
- Verify the API key is correct
- Check browser console for error messages
- Ensure the HumanBehavior component is included in your layout
- Check your network tab for API calls to HumanBehavior
- Verify the API key has the correct permissions
- Check browser console for any error messages
Next Steps
Once you’ve completed the setup:- Test the integration by visiting your site and checking the browser console
- Verify events are being sent to your HumanBehavior dashboard
- Customize tracking by adding custom events where needed
- Monitor performance to ensure the SDK isn’t impacting your site